Pages

Wednesday, December 4, 2013

Christmas Bells for Primary Grades


Wow, December is upon us just like that! Celebrating Thanksgiving so late in November seems to have shortened the Christmas season a bit, so some of you may be looking to simplify holiday lessons or performances. Here's an easy, fun (yet worthwhile) activity I'll be doing with K-2 classes at several schools this month.
 
Practice chanting the poem to a steady beat first. Then have students play assigned bells on the beat, and sing all syllables that belong to one beat on the pitch the designated bell produces. I have several of these I hope to add to my TPT store soon. For now, here's a freebie 4 U. Enjoy it with your kiddos! : )
   
 http://www.teacherspayteachers.com/Product/Rhymes-and-Chimes-for-Christmas-Time-Five-Poetry-to-Song-Activities-for-Bells-1012129
 
 
I'm back : )  I finished the set of
Rhymes and Chimes for Christmas Time, and I'm having so much FUN with this! I designed this material for myself, K-3 classroom teachers, music teachers, home-schoolers, and families. There are some great language fluency skills that come with this 'spoon full of sugar,' and the language concepts and activities flow into musical ones so easily. Also, this is the easiest way to put together a musical performance with bells and young children. Here are some sample pages:


http://www.teacherspayteachers.com/Product/Rhymes-and-Chimes-for-Christmas-Time-Five-Poetry-to-Song-Activities-for-Bells-1012129http://www.teacherspayteachers.com/Product/Rhymes-and-Chimes-for-Christmas-Time-Five-Poetry-to-Song-Activities-for-Bells-1012129
 
I created five pieces with five options for each:  poem text, poem text with accented syllables (the ones bells will be played on), colored text, colored text with bell icons, and actual notation for teacher reference or older students. (Teachers and students don't need to be able to read the music notation to be successful with this.) I've also included a sheet of printable labels to color-code plain chimes or bells.

You can click on a sample page to go to my store and purchase this set of five piece set (20 pages of printables or projectables).  Thanks for stopping by!


Tuesday, November 19, 2013

XOXO - You'll Love this Holiday Play-Along

Here come the holidays! And here's one my favorite holiday play-along activities for classroom, music room or easy-to-prepare performance. This video has been a favorite with many student groups (and their teachers). In appreciation of my followers and TPT customers, I want to share it here. This activity will help students experience and explore timbre, melody, form, and rhythm ostinatos in a joyful, novel way.

Instructions
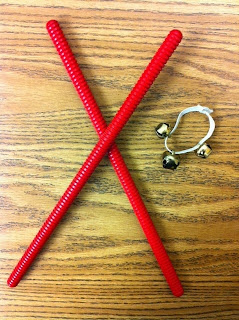
You will need one pair of rhythm sticks and one wrist bell band for each student. I make wrist bells by stringing three jingle bells onto a piece of braided (flat) elastic. These are a great investment and will serve you well for many years.

Have students put the wrist bell band on their dominant wrist -- the one they use to hold their top rhythm stick. Have them play along with the video, reading the iconic notation for the ostinatos. The "X" means to tap their sticks on a beat, and the "O" means to shake their bells (while still holding sticks). 


For younger students, use the macro beat, at a tempo of 82 BPM. For older students or adults, use the micro beat at a tempo of 164.  
 
Explore and map the form of this delightful composition with your students. Then let them compose new ostinatos using "X' and "O."  Enjoy!
 
Form: Introduction, A, A (softer w/flute variation), B (mallets), bridge (intro.), A (clarinet), A (louder), bridge (bass clarinet), C (brass), D (bass clarinet, tuba), C (circus-like), bridge, A, A(louder), coda 


Sunday, November 10, 2013

Thanksgiving Ideas & Singing Game Freebie

I can hardly believe we're into November! I love autumn time, especially because of Thanksgiving. A couple of weeks ago, I presented a day-long workshop with a bunch of Thanksgiving music ideas, and I want to share a singing game that was a hit.


You can download this singing game and teaching guide in a tidy one-page format FREE from my TPT store by clicking HERE. 
Singing Game Directions
Have students form two concentric circles (one inside the other with 2/5 of the class as the inner ring, and 3/5 as the outer). Model the song for students and ask them to listen carefully. Then ask them some questions about the song and sing the answers. (For example, "What three things does the turkey need to trot through?") Check student understanding of the meanings of "trot" and "dawdle." 

Next, have children listen to and immediately echo each phrase you sing to them. Then combine two phrases, and finally, sing the entire piece. Invite students to hold hands with their neighbors, sing, and step to the beat, with the inner circle moving clockwise while the outer circle moves counter-clockwise. Repeat singing and stepping, and this time, raise and lower held-hands in this pattern: first phrase - low, second phrase - high above heads, third phrase - low, and fourth phrase - high. (This will create openings for the farmer and turkey to move through.)

Select one student to be the 'farmer' and another to be the 'bird.' The bird/turkey will stand in the center of the inside ring, and the farmer will stand outside the outer ring. When singing begins, the farmer will move in after the turkey, while the turkey avoids the farmer and works to get 'free' (outside both circles without getting tagged by the farmer). If the farmer tags the turkey, s/he becomes the new turkey, and the former turkey selects a new farmer and takes his/her place in the circle. If the farmer doesn't tag the turkey, both players will quickly select their replacements and take their places in the circle(s).  


Build Concepts and Skills  
(1) Have students sing the song, omitting the word/note on the fourth beat of each measure. Help them discover/identify the s-s l-l s-m melody pattern which occurs on the first three beats of each measure. Have students sing and sign the pattern four times, resting or clapping on the fourth beat, as you quickly write it on the board (as if taking dictation). Put a question mark for each fourth beat. Guide students in discovering and comparing the phrase endings (so, re, do). (2) Explore/identify the rhythms of “trot” / “gobble.” Create a one-measure rhythm ostinato using these words, and accompany the song with it. Enjoy!

You can download this singing game and teaching guide in a tidy one-page format FREE from my TPT store by clicking HERE. While you're there, you might want to check out these additional Thanksgiving music materials:  


Turkey Tappers - Rhythm Memory Game for Center or Class Activity
Dishing Up Rhythm for Thanksgiving - Text to Rhythm Activities, Two Levels


Turkey-Tac-Toe - Engaging Game and Assessment, Four Different Levels
http://www.teacherspayteachers.com/Product/Turkey-Tunes-so-mi-Melody-Matching-Class-Game-or-Center-948047

http://www.teacherspayteachers.com/Product/Over-the-River-and-Through-the-Wood-Color-Chord-inated-for-Bells-Boomwhackers-419352

Thanks for stopping by. Happy Thanksgiving!


Thursday, October 10, 2013

Rhythmic Language Activities for Fall

Whew! The first six weeks of school have kept me busier than I'd like to be, but I'm enjoying new friendships and opportunities to develop and share ideas and materials. I've finally found time to put some of my autumn rhythm activities in a shareable format, and I want to give a brief outline of what I do and highlight a few of my recent publications.

I love using Gunild Keetman's Rhythm Building Blocks/Bricks to explore the rhythms embedded in language (and vice versa)! Here are some of my favorite rhythmic language activities which use Rhythm Building Blocks:

   * Extract two-beat patterns from simple poetry (or lyrics) and match
      them to corresponding Building Blocks.
   * Create a list of themed words and phrases and then explore/match
      their rhythms to the Building Blocks.
   * Give students word/phrase slips and have them discover and write
      the rhythm notation above the words. Then have students work in
      groups of four to create and share a performance sequence.
   * Then have students compose using body percussion or a limited
      tone set based on their rhythms.

A couple of hints: (1) Choose text carefully to set students up for joyful and successful learning.  Whenever possible, use separate words for separate beats or subdivisions. For example, "falling leaves" for 'ti-ti tah' or 'tiki-ti.' (2) This traditionally K-2 technique works very well with older students and more complex notation. For example, a two beat rhythm comprised of a quarter note and two eighth notes sounds the same as a one-beat pattern comprised of one eighth note with two sixteenth notes.


Note: I include black and white printables in my sets for economical printing.


Thursday, September 5, 2013

Learning Hundreds of Names

Elementary music teachers have the unique opportunity to teach and touch the lives of nearly every child who attends their school. This creates a special challenge: learning students' names.
 
Name games are a great way to welcome and engage students at the first of a school year, while at the same time, provide opportunities to connect faces and names and assess in-tune singing.
 
Here's a fun name game for younger students that's worked well for me. I'm posting this as a FREEBIE on TPT for my followers and blog visitors in hopes you will find it a useful and joyful way to build rapport during the first quarter of the school year.
This 7-page packet in PDF format includes two singing games, detailed lesson guides, and printable/projectable graphics to enhance the lessons. I have used my Note-able Font and Colorful Music Clip Art to create this and demonstrate these products in action. Enjoy : )


Another very useful technique for getting to know students' names is to create seating charts for each class.
Yes, this takes time, but it's so worthwhile to see a child's face light up when you call him/her by name! (And after calling a student by his/her correct name a few times, I find I can remember it). Here is a unique  elementary music seating chart/roll template I developed in an effort to keep everything on one page - seat boxes for names with record keeping boxes attached to each 'seat.' The chart is laid out as the teacher sees the room from the front, and it groups students for quick teaming and collaborative work. I always keep an aisle down the center of the rows to facilitate proximity/behavior management and easy movement. Even though elementary classes involve a lot of movement and activity, having assigned spots makes classroom management much easier. Students know where to go as they enter the room, and I'm able to quickly record attendance, pass-offs, behavior issues, etc.
 
You can print the sheet I'm posting here (just click on it to save and print), or you can find an editable template in Word format here: All-in-One Seating, Roll and Record Chart - Editable Template


What do you think of this? Would it work for you? Have you developed a seating/record keeping system you'd like to share? If so please describe it in a comment box. 


Wednesday, August 28, 2013

Amplify the JOY and enJOY the ride!

As each new school year begins, I find myself re-evaluating, goal-setting and anticipating a joyful year. I feel very blessed to have a career doing something I love! A perspective that keeps me going year after year and guides me in creating meaningful and joyful music lessons and materials is this: 
The prize is in the process! 
I adopted this mantra years ago, and it has helped me focus on my students' needs and allowed me to enjoy my work much more than I did early in my career.
 
As music teachers, we often feel pressured to have our students present, perform, and even compete. But the truly great musical learning moments take place while we're exploring, evaluating, creating, and refining a piece of music. While preparing to perform music helps us set goals, the actual performance is simply a 'snapshot' in time and hardly a true reflection of the wondrous process that has taken place and the learning that will last a lifetime. I have found that 'inform-ances' are usually more meaningful for my students and their audiences (who are mainly family members genuinely interested in what students are learning).  This has relieved a lot of pressure and brought much more satisfaction and joy to my work. 


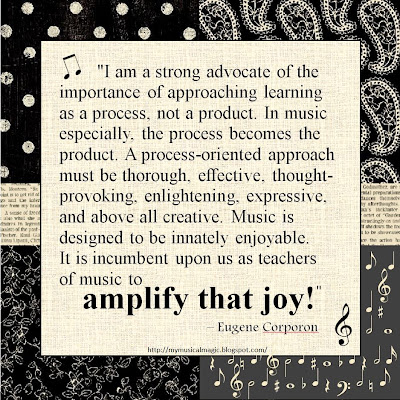
When I recently came across this quote, it resonated deeply with me. So I created a poster for my office to remind myself to amplify the innate joy of learning and making music. (It's a bit wordy but SO powerful. Go ahead; re-read it.) I'm posting it here for my visitors to print and enjoy. (Just click on the picture to open and print it.)


Wishing you a JOYful school year!  

Smile and enJOY the ride!    

Monday, August 5, 2013

Back-to-School Specials and Freebies

The beginning of a new school year brings a unique energy filled with goals, new ideas, new classroom set-ups, and new relationshipsI just love it! In celebration of the new school year, I'm offering some freebies and specials in my TeachersPayTeachers Store:


Here's another FREE POSTER to brighten your classroom or dress up your doorway. It matches my Music Posters set and the Music Rules Poster freebie I previously posted. It also comes in a black & white version (see below). Enjoy : )
http://www.teacherspayteachers.com/Product/Welcome-to-our-Music-Room-Poster-FREEBIE-811712


Music Room Must-Haves 


A mega-package of my best selling printables, posters and projectables (anchor charts, scale charts, graphics, manipulatives, and teaching aids, 178 pages). These five products are $39 when bought singly (and a good  value at that).
Bundle price: $28.95 for the whole kaboodle. That's  25% OFF! 


If you haven't discovered my Music Teacher's Toolbox FREEBIE yet (@3,000 down- loads), you might want to add these very useful printables to your teaching materials.  http://www.teacherspayteachers.com/Product/Music-Teachers-Toolbox-Staff-and-Beat-Map-Templates-469869


I keep adding! Here's a FREE and very useful little BORDER to use as a topper or bulletin board trim. This page is from my Piano Posters, Charts, & Borders set.
http://www.teacherspayteachers.com/Product/Piano-Keyboard-Border-Board-Runner-or-Bulletin-Board-Trim-FREE-829376


Here's a pic of the black and white version of the Welcome Poster. I always include black and white (economical printing) options with my products.
http://www.teacherspayteachers.com/Product/Welcome-to-our-Music-Room-Poster-FREEBIE-811712

Thanks for stopping by!


Sunday, August 4, 2013

Stumpf Fiddles and Stomp Sticks

Meet Joe, my Stumpf Fiddle. He has served as the percussion section for my high school fiddle group as well as my third grade hoedown program. He's great for getting students' attention, keeping a steady beat, exploring timbre, and improvising with rhythm patterns. As you can see, Joe isn't the typical Stumpf fiddle (if there is such a thing); most don't have faces and wear a hat. The novelty of naming him and making him a member of musical groups has worked very well with my students.

I built him on an old-fashioned mop stick - the type with a metal bracket to hold the mop. This gave me something to attach the head boards to. I cut two identical shapes out of 1" x 12" pine and screwed them together with the metal frame in the middle. 

Then, with a nail, I punched/hammered holes in the middle of a bunch of old bottle caps, and attached groups of three caps to the head using wood screws. (Wood screws are the type that have threads on the end but a smooth shank .) I only drove the screws part way in, leaving the bottle caps free to jingle.

Joe's 'outfit' can be changed or added to. Currently, I really like his 'ribs' - an old Jell-O mold that gives both a nice clang and a washboard-type sound. His standard equipment also includes an old wood block, a plastic bucket, and a bike horn. His jingles (bottle caps) provide a tambourine effect, and at Christmas, I like to tie on some jingle bells. I use a rubber ball or large rubber cap on the bottom of the stick, which when struck against the floor, serves as a bass drum.

Although I'm a string player, I didn't like having a string on this instrument because it got in the way and it wasn't loud enough to be heard over the other sounds. So I guess technically, this is a Stumpf stick. I also like to call this a STOMP STICK because it 'stomps' the beat and uses a lot of found-sounds, as does the famous group, STOMP. (Kids relate well to this.)

Stumpf fiddles are known by several names and have an interesting history. They can be very useful and FUN. Here's are a couple of links to brief histories of the instrument in its various forms and some basic instructions: http://www.stumpffiddle.net/history/   http://www.nyphilkids.org/lab/make_onemanband.html


Obviously, a classroom full of stomp sticks would be impractical and extremely noisy. So I developed this MINI STOMP STICK, which has a variety of timbres and can be played by tapping it on a desktop, book, or chair seat.  These have been a big hit with several teachers and their students. Older students can help make these, or a parent volunteer can help you put these together for younger ones. Either way, you will want to do a bit of prep such as cutting dowels to length and drilling small holes where the screws will be driven.


Click on the arrow below to watch a demonstration of this awesome little instrument in action.


For each mini stomp stick you will need:

A 16" length of a 7/8" diameter dowel
(You can get three from a standard 48" dowel)

One 1" wood screw

One 3/8" wood screw

Three bottle caps (and a couple of small, thin washers if desired)

A small tin can with corrugated sides (6 oz. tomato sauce  or fruit can)

An 8-10" length of quarter-inch dowel (mallet handle)

A wooden bead with a quarter-inch hole (mallet head)

Tools: hammer and nail, screwdriver, drill, large metal file, electric drill with a small bit, and wood glue

(1) Cut dowels to length. (2) Drill a small hole in the top end of the stick, and on one side about 1/3 down from the top. These will help the screws go in easily and prevent wood from splitting. (3) Punch holes in the center of each bottle cap and into the center of the can's bottom. (4) File ridges into the lower half of the stick on the front side (same side as the hole you drilled) about 1/4" apart. (5) Stack bottle caps (and washers) onto the wood screw and drive the screw part way into the front, leaving enough room for the pieces to jingle. (6) Fasten the can onto the top of the stick using the smaller screw. (7) Apply glue to the end of the mallet dowel and inside the bead's hole, insert the dowel, and wipe off excess glue. 

As with any Stumpf fiddle, students can experiment with combinations and materials. Here's a picture of a variation which produces three timbres instead of four:   


I would love to hear about any Stumpf fiddles or stomp sticks you create.

Monday, July 22, 2013

Make a Tube Drum

Tube Drum How-to

This is one of my FAVORITE drums to play, and my professional percussionist friends can't believe I made it. This drum costs $35 to make and yet rivals drums costing six times as much.

How I used this............


.....to make this:


Materials List: 
A concrete pillar form (AKA Sono tube), 8", 10", 12" or 14" diameter, depending on the size of drum you want (available at major hardware stores)

Wooden embroidery hoop, one size larger than the diameter of the form/tube

Drum head, 3-4" greater in diameter than your tube  (a medium thick skin/hide or rip-stop nylon/pack cloth). I ordered the skin head pictured here from drumfactorydirect.com. 

Gorilla glue

White glue, clear-drying such as Elmer's brand


Mod Podge (or two parts white glue mixed with one part water)
 

Colorful fabric, (woven, not knit), width=drum height; length=drum's circumference plus 2"

Jute or flat braided trim


Tools: small saw, staple gun & staples, small clamps for gluing, scissors, foam brush

Note: If you want to create a Tubano apparatus, you will also need an 8" to 14" square of Masonite (depending on the diameter of your pillar form/tube) and a 4" diameter PVC pipe collar. I have not found that adding this feature improves tone contrast much or is worth the work on a homemade drum, especially if you use nylon cloth for the head. However, I will include basic directions and a link for more detailed instructions in case this is a feature you want to add.


1 - Determine and cut the drum height you want (2' for kids, up to 3' for adults). Measure and mark the height around the sono tube, and then cut it with a saw and/or box knife (or better yet, have it done at the hardware store).


2 - Reinforce upper edge. Cut the inner ring of the wooden embroidery hoop and trim it to fit snugly inside the tube. Apply Gorilla Glue to the inside upper edge of your drum, press the wooden ring into the glue, clamp it to hold it in place, and allow glue to dry.


2b - If desired, create and install a Tubano ring at this point (optional). See instructions at the end of this post.

3 - Shape and reinforce the bottom edge. Mark and cut out three arcs or rectangles (2.5" x 3"), evenly spaced around the bottom edge. (These 'open doors' will let the sound out.) Reinforce the bottom edges by gluing and clamping wood pieces cut from the outer ring of the embroidery hoop. 


4 - Soak the drum head in a tub of lukewarm water for about an hour. Lay the skin on a towel and blot it when you take it out of the water, and then immediately move to the next step. If using pack cloth in lieu of skin, soak it in hot tap water for ten minutes and blot.

5- Stretch and staple the head onto the side of the top edge, driving staples into the embroidery hoop. Important: Ensure even tension on the head by stapling at points that correspond with 12 o’clock and 6:00, 3:00 and 9:00, etc.  Continue stretching and stapling the head across the drum. Then trim excess close to staples.


6- Apply fabric and trim. Coat the outer drum body with Mod-Podge (or substitute 2/3 white and 1/3 water mixture). Quickly lay fabric onto and around the drum body and smooth out any wrinkles. Trim fabric if needed. Then apply a generous layer of Mod-Podge onto the fabric. Apply a line of white glue (dries clear) along the seam where the fabric edges meet. As the glue dries, you may want to check and press the seam to ensure it lays flat and looks neat. Glue braided jute, trim or fabric around the top edge of drum to conceal staples and add personality.
Enjoy!

Instructions for Adding a Tubano Apparatus:
(Do this between steps 2 and 3 above.)
2b - Place your drum tube on the Masonite sheet and trace the inner edge of the tube onto the Masonite. Cut out this circle with a hack saw.
2c - Next, center the 4" PVC collar in your Masonite circle and snugly trace the outside edge. Cut the 4" circle out (drill center to get started).
2d - Use Gorilla Glue to mount one end of the PVC collar in center of Masonite.
2e - Measure and mark 1/4 of the way up from the bottom of your drum tube.
2f - Insert the Tubano apparatus into the drum with the PVC piece facing toward bottom, and push it above your 1/4 way markings (so it can be moved down later).
2g - From the outside of the drum, drive staples a few inches apart around the circumference of the drum. (This creates a 'shelf' for the Masonite ring to rest on.)
2h - Push the Masonite ring down to rest on the staples and apply Gorilla Glue around the top edge of the ring inner side of tube.

Sorry, I didn't take any pictures of this process, but here's a link to another beautiful do-it-yourself drum with detailed pics of the Tubano apparatus (using an oatmeal container instead of a PVC collar): http://typeadoityourself.blogspot.com/2012/01/homemade-tubano-drum.html

Tuesday, July 16, 2013

Freebie: Music Class Rules Poster

I can hardly believe I'm seeing back-to-school ads on TV already! However, as teachers, we're all thinking about and preparing for the coming school year most of the summer. 
 
Here's something to brighten your classroom, save you some prep time, and help with behavior management. I've seen several variations of classroom rules on Pinterest using 'MUSIC' as an acrostic, so I decided to share my version as a freebie. This poster is designed to print on legal-size paper (8.5 x 14"), but it can be enlarged or printed on smaller paper and tiled/mounted. This is a free download from my TPT shop, and you'll receive both formats in the PDF.
 
These rules cover my expectations and support positive behavior very well. I hope you'll find them useful too.  
 
 
This poster is part of my set of MUSIC POSTERS - Elements Anchor Charts & Rules. I have created many additional coordinating charts, posters, borders, word wall cards and teaching aids. As with most of my products, I include multicolor and black & white formats.
 
You can check them out in my TPT Store: http://www.teacherspayteachers.com/Store/Musical-Magic
 
                                 Thanks for visiting : )