Pages

Wednesday, August 28, 2013

Amplify the JOY and enJOY the ride!

As each new school year begins, I find myself re-evaluating, goal-setting and anticipating a joyful year. I feel very blessed to have a career doing something I love! A perspective that keeps me going year after year and guides me in creating meaningful and joyful music lessons and materials is this: 
The prize is in the process! 
I adopted this mantra years ago, and it has helped me focus on my students' needs and allowed me to enjoy my work much more than I did early in my career.
 
As music teachers, we often feel pressured to have our students present, perform, and even compete. But the truly great musical learning moments take place while we're exploring, evaluating, creating, and refining a piece of music. While preparing to perform music helps us set goals, the actual performance is simply a 'snapshot' in time and hardly a true reflection of the wondrous process that has taken place and the learning that will last a lifetime. I have found that 'inform-ances' are usually more meaningful for my students and their audiences (who are mainly family members genuinely interested in what students are learning).  This has relieved a lot of pressure and brought much more satisfaction and joy to my work. 


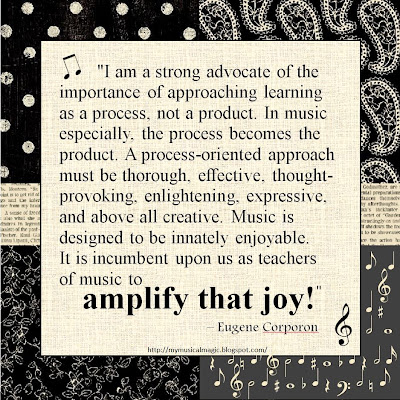
When I recently came across this quote, it resonated deeply with me. So I created a poster for my office to remind myself to amplify the innate joy of learning and making music. (It's a bit wordy but SO powerful. Go ahead; re-read it.) I'm posting it here for my visitors to print and enjoy. (Just click on the picture to open and print it.)


Wishing you a JOYful school year!  

Smile and enJOY the ride!    

Monday, August 5, 2013

Back-to-School Specials and Freebies

The beginning of a new school year brings a unique energy filled with goals, new ideas, new classroom set-ups, and new relationshipsI just love it! In celebration of the new school year, I'm offering some freebies and specials in my TeachersPayTeachers Store:


Here's another FREE POSTER to brighten your classroom or dress up your doorway. It matches my Music Posters set and the Music Rules Poster freebie I previously posted. It also comes in a black & white version (see below). Enjoy : )
http://www.teacherspayteachers.com/Product/Welcome-to-our-Music-Room-Poster-FREEBIE-811712


Music Room Must-Haves 


A mega-package of my best selling printables, posters and projectables (anchor charts, scale charts, graphics, manipulatives, and teaching aids, 178 pages). These five products are $39 when bought singly (and a good  value at that).
Bundle price: $28.95 for the whole kaboodle. That's  25% OFF! 


If you haven't discovered my Music Teacher's Toolbox FREEBIE yet (@3,000 down- loads), you might want to add these very useful printables to your teaching materials.  http://www.teacherspayteachers.com/Product/Music-Teachers-Toolbox-Staff-and-Beat-Map-Templates-469869


I keep adding! Here's a FREE and very useful little BORDER to use as a topper or bulletin board trim. This page is from my Piano Posters, Charts, & Borders set.
http://www.teacherspayteachers.com/Product/Piano-Keyboard-Border-Board-Runner-or-Bulletin-Board-Trim-FREE-829376


Here's a pic of the black and white version of the Welcome Poster. I always include black and white (economical printing) options with my products.
http://www.teacherspayteachers.com/Product/Welcome-to-our-Music-Room-Poster-FREEBIE-811712

Thanks for stopping by!


Sunday, August 4, 2013

Stumpf Fiddles and Stomp Sticks

Meet Joe, my Stumpf Fiddle. He has served as the percussion section for my high school fiddle group as well as my third grade hoedown program. He's great for getting students' attention, keeping a steady beat, exploring timbre, and improvising with rhythm patterns. As you can see, Joe isn't the typical Stumpf fiddle (if there is such a thing); most don't have faces and wear a hat. The novelty of naming him and making him a member of musical groups has worked very well with my students.

I built him on an old-fashioned mop stick - the type with a metal bracket to hold the mop. This gave me something to attach the head boards to. I cut two identical shapes out of 1" x 12" pine and screwed them together with the metal frame in the middle. 

Then, with a nail, I punched/hammered holes in the middle of a bunch of old bottle caps, and attached groups of three caps to the head using wood screws. (Wood screws are the type that have threads on the end but a smooth shank .) I only drove the screws part way in, leaving the bottle caps free to jingle.

Joe's 'outfit' can be changed or added to. Currently, I really like his 'ribs' - an old Jell-O mold that gives both a nice clang and a washboard-type sound. His standard equipment also includes an old wood block, a plastic bucket, and a bike horn. His jingles (bottle caps) provide a tambourine effect, and at Christmas, I like to tie on some jingle bells. I use a rubber ball or large rubber cap on the bottom of the stick, which when struck against the floor, serves as a bass drum.

Although I'm a string player, I didn't like having a string on this instrument because it got in the way and it wasn't loud enough to be heard over the other sounds. So I guess technically, this is a Stumpf stick. I also like to call this a STOMP STICK because it 'stomps' the beat and uses a lot of found-sounds, as does the famous group, STOMP. (Kids relate well to this.)

Stumpf fiddles are known by several names and have an interesting history. They can be very useful and FUN. Here's are a couple of links to brief histories of the instrument in its various forms and some basic instructions: http://www.stumpffiddle.net/history/   http://www.nyphilkids.org/lab/make_onemanband.html


Obviously, a classroom full of stomp sticks would be impractical and extremely noisy. So I developed this MINI STOMP STICK, which has a variety of timbres and can be played by tapping it on a desktop, book, or chair seat.  These have been a big hit with several teachers and their students. Older students can help make these, or a parent volunteer can help you put these together for younger ones. Either way, you will want to do a bit of prep such as cutting dowels to length and drilling small holes where the screws will be driven.


Click on the arrow below to watch a demonstration of this awesome little instrument in action.


For each mini stomp stick you will need:

A 16" length of a 7/8" diameter dowel
(You can get three from a standard 48" dowel)

One 1" wood screw

One 3/8" wood screw

Three bottle caps (and a couple of small, thin washers if desired)

A small tin can with corrugated sides (6 oz. tomato sauce  or fruit can)

An 8-10" length of quarter-inch dowel (mallet handle)

A wooden bead with a quarter-inch hole (mallet head)

Tools: hammer and nail, screwdriver, drill, large metal file, electric drill with a small bit, and wood glue

(1) Cut dowels to length. (2) Drill a small hole in the top end of the stick, and on one side about 1/3 down from the top. These will help the screws go in easily and prevent wood from splitting. (3) Punch holes in the center of each bottle cap and into the center of the can's bottom. (4) File ridges into the lower half of the stick on the front side (same side as the hole you drilled) about 1/4" apart. (5) Stack bottle caps (and washers) onto the wood screw and drive the screw part way into the front, leaving enough room for the pieces to jingle. (6) Fasten the can onto the top of the stick using the smaller screw. (7) Apply glue to the end of the mallet dowel and inside the bead's hole, insert the dowel, and wipe off excess glue. 

As with any Stumpf fiddle, students can experiment with combinations and materials. Here's a picture of a variation which produces three timbres instead of four:   


I would love to hear about any Stumpf fiddles or stomp sticks you create.