Pages

Saturday, September 27, 2014

The 'Handy, Hands-on' Hand Staff

I love using iconic notation and manipulatives in my music lessons. When exploring pitch patterns (solfege or note addresses), the hand staff    is a powerful and ultimately convenient tool. It is always 'at hand' and provides instant 'hands-on' learning experiences. (Pardon the puns; I can't resist!)

If the hand staff is a new concept/technique to you, you can adopt it easily and quickly. Simply have students hold their left hands in front of them, palm toward body, and treat their digits as the five lines on a staff. Have students touch on lines (fingers) or in spaces (between fingers). Identify a starting point, e.g. "G on the second line is so," and touch 'notes' as you sing simple pitch patterns. You might also find it useful to have students trace a clef of their palm to help them envision the staff and identify "G."

I like to use visuals to help students relate their hands to the staff. Here are a few examples of things I've done: 

I post a hand silhouette that corresponds to existing staff lines on my whiteboard. If you don't have a staff-lined whiteboard, create a poster by tracing your hand and drawing staff lines that extend from finger tips. (The above picture is a bit distorted. The one below is better.) 


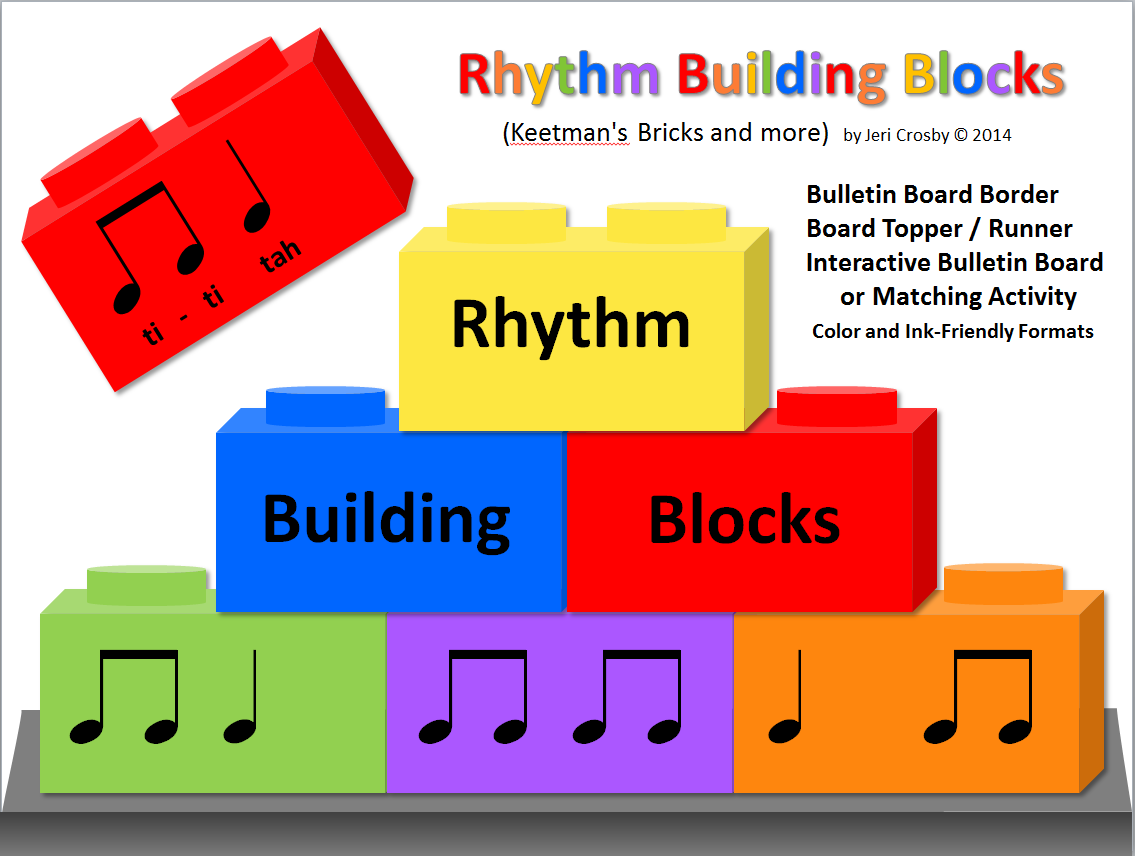
BTW, I have a ready-to-go printable Hand Staff Poster and Note Heads kit in my TPT store. The Rhythm Building Blocks in the above picture are also available in my store. 


I helped music teachers who attended one of my workshops make these gloves and flying notes. The gloves are inexpensive, stretchy knit ($1 per pair) and fit children's to adult's hands. We drew the staff lines on with a permanent marker and made the notes out of wood pieces (flat circles and sticks) purchased at a craft store. We then painted the wood black with acrylic paint. It was a quick, easy and useful project. Kids love these!


Finally, here is my 'Scissorhands' version of the hand staff. Yes, it's one of those crazy projects I envisioned and created late at night! I used a heavier fabric glove, five dowel pieces, black paint, needle and black thread, and a touch of glue. My students get a kick out of this one, but it's not nearly as practical as the glove pictured above. Thought I'd share it anyway and give you a glimpse into my strange teacher mind.  : )


Sunday, August 3, 2014

Music Room Poster Freebie


In celebration of the new school year, I have posted a new, FREE classroom poster (sample and link above) which coordinates with many of my other teaching materials (a couple of linked examples below). Wishing teachers everywhere the best school year yet! : )


Wednesday, July 30, 2014

Make a Lint Roller Maraca

Here's a quick and easy instrument-making project for summer camp or school. Anytime I'm throwing something away, I explore its recycling options; and turning a used item into a musical instrument is my favorite recycling option! The other day, as I used the last section of sticky-tape on a lint roller, I immediately imagined a maraca. The handle fit perfectly in my hand, and most of the work was already done. It only took about 20 minutes to complete this project.


Materials:

Plastic lint roller handle
1 pkg. of small glass
   beads (seed beads)
Small funnel
Glue (plastic cement)
Toothpick
Paper and markers
   (or scrapbook paper)


Instructions:
There is a small hole in the top center of the large end of the lint roller. You may need to make it a tiny bit larger, but keep it as small a possible. Using a funnel (or piece of paper wrapped into a cone), put the beads into the cylinder.

Break a tip off of the toothpick to serve as a plug. Then put a dab of glue over the filling hole, stick the toothpick tip into the hole, and put another tiny dab of glue over it.

Create a colorful, geometric design on a piece of paper cut to fit the cylinder section of the lint roller (or use some printed scrapbook paper as I did because I was in a hurry on this one). Glue the paper around and onto the cylinder.

Please note: the maraca will sound best if you hold it with the handle on top (upside down). This will allow the beads to move freely rather than get trapped in the handle. Cha-cha-cha!


Saturday, July 12, 2014

Water Pipe Trombone


Here's a quick and fun instrument project I shared recently at BYU Arts Express in my 'STEAM' session. 


When designing/engineering an instrument, always keep in mind that any musical instrument requires three mechanisms: 
                  (1) material or technique to produce VIBRATION, 
                  (2) material to act as an AMPLIFIER of sound waves, and 
                  (3) mechanism or technique to control or VARY PITCH.

Since the player's buzzing lips are the source of vibration, this ‘trombone’ only requires the pitch variation and amplification mechanisms, and thus, it's very easy to make. 

MATERIALS:
A length of cold water pipe (blue PEX, 1/2” diameter)
A length of hot water pipe (red PEX, 5/8” diameter)

A plastic funnel that will fit either over or inside one of your pipes 
    (The funnel can be trimmed to fit if its neck tapers.)
Stickers or colored tape for decorating (if desired)

TOOLS:
A ruler or measuring tape
A marker
A small hacksaw or sturdy knife for cutting
Duco Cement or other plastic cement for gluing funnel to pipe

PEX pipe is very easy and inexpensive to use. You will find it available at hardware and home improvement stores. I can cut it with small hacksaw (or even a sturdy paring knife), and its filings/dust doesn't have the respiratory dangers of PVC. 


Measure and mark each pipe, the blue, smaller one should be an inch or two longer than the red, larger one. For this instrument, I used 13.5 and 12.5 inch lengths. (Note: It's tempting to cut the pipes longer, but pitch control will be reduced by leaking air, and students' arms don't reach more than a couple of feet anyway.)


Determine whether your funnel will best fit inside or outside one of your pipes. You can trim the tapered neck of a funnel to fit your pipe. If you need to do so, ensure a snug fit by inserting your pipe into the open end of the funnel and marking where it makes contact with the neck.


Glue the funnel in place. Insert the wider diameter pipe over the smaller one. Decorate as desired. Press your lips against the end of your mouth pipe and slide the other pipe (with the funnel 'bell') in and out to vary pitch. Changing the speed and tension of your buzzing lips will also change the pitch.

                                                               Have Fun!

Music Notation Solutions: Note-able Font and Music Notation and Symbols Clip Art


Over the years, I've spent countless hours scouring the internet for good music notation clip art and music fonts to insert into music worksheets, flashcards, and presentations. (Yes, I do use music notation software, but sometimes music educators simply need to include music notation in word processing or presentation files.) I organized folders of various note, rest, clef and music symbol images I found on the Net, but their styles and sizes were inconsistent. I also found that I could insert some notes and symbols from my music software into text boxes, which was useful but non-intuitive and very time-consuming. I eventually purchased a rather archaic music font, and although it wasn't my dream come true, I was glad to have consistently sized and shaped symbols. While I kept wishing for something more user-friendly and efficient, I learned to work around or live with its limitations: (1) its preset note-spacing made it very hard to control document layout, (2) it wasn't intuitive, and (3) when I typed beamed notes for combination rhythms, the 'seams' showed.

Fast forward... A few years later, as I was studying clip art and font design, I realized I could solve my music notation frustrations and provide for my own needs! And now my resulting projects are available to others via the Web (TPT and Etsy). I figure it's time to 'toot my own horn' here on my blog and let readers know about these products since I'm receiving such great feedback about them.

In this post, I present my Note-ablFont and music clip art packages.


                              Sample page from user's quick-start guide. 
          Clicking on pictures will take you to a webpage where these are available for purchase.

This TrueType font set (for use on Mac/Apple or PC) allows a user to easily combine text, rhythm notation, articulations, Curwen hand signs and stick notation to create flash cards, music manipulatives, assessments, slides, posters and visual aids. This package includes two fonts: (1) traditional notation (notes, rests, articulations, etc.) and (2) Kodaly and Orff-style notation (stick rhythms, Curwen hand signs, icons, etc.) for a total of 175 sharp, professional music notes and symbols for personal, classroom and small commercial use. No additional commercial use license is required as long as you include credit and a link. The package also includes a detailed user's guide with instructions, keyboard charts, helpful hints and practice guides. 

     A few things that make this font different/better than others:
Beamed notes are single figures/keystrokes.
The user controls spacing between notes.
Ties and articulation marks can be inserted.
Traditional and Kodaly/Orff-style notation is included.
Intuitive layout, quick and easy to learn.
Detailed tutorial and charts are included.
Only $16.95 versus $20, $25 and $40 for others.

Here are some quotes from my TPT feedback page regarding my Note-able Font Package:

“Love this. It's an answer to so many questions and needs as a music teacher who likes to create her own teaching aids and materials! Thanks for sharing this!”  

“ Where has this been all my life? User friendly and so helpful!”

 “Fantastic! I've tried several music notation fonts and this is by-far the best one I've found.”

“Instructions on how to load the font were a great help and the charts are incredibly handy. Thanks so much! I am using it already.”

I am grateful to Tracy King for recently reviewing my Note-able Fonts on her excellent blog: http://mrskingrocks.blogspot.com/2013/12/a-music-font-for-music-teachers.html

                        Additional sample pages from the Note-able Font Package:


At times, music clip art is a more effective way to go. I created this set to meet this need. It also includes a handy user's guide and templates.


And last, but certainly not least, I have created this clean, colorful set of music notation clip art. These images are great from creating posters, classroom decorations, and bell or Boomwhacker charts.


Samples


These files are also available in my Etsy Store and in my TeachersPayTeachers Store

SUMMER UPDATE

Readers may have noticed my recent ‘leave of absence’ from blogging and music materials production. I have been in transition between jobs, homes, and cities, and the move has taken time and energy beyond description. I am happy and anxious to get back to posting!


In June, (yes, in the middle of moving), I had the opportunity to teach a couple of workshops at the annual Arts Express Conference, sponsored by the BYU Arts Partnership. This year, the theme was “Full STEAM Ahead,” referring to the inclusion of arts education (thus the “A”) with the ‘STEM’ subjects. Instrument-making aligned PERFECTLY with the engineering process and some important math and science concepts (fractions, harmonics, frequency, amplitude, acoustics, etc.). 

I had the opportunity to collaborate and present with a very fine dance educator, Angela Challis; and together, we helped teachers explore dance and music integrations, create instruments, and compose both music and choreography. The teachers who attended made it such fun because they were creative, collaborative, and willing to 'play' in more ways than one. It was an absolute blast!

Everyone who attended built a mini stomp stick (see previous post) and then composed layered ostinatos and movement using their instruments. Then we divided participants into four groups, and each group constructed a different instrument – (1) a mini washtub bass (post to come), (2) a water pipe trombone (new post), (3) a panpipe (previous post), or (4) a string-o-phone (previous post). When I get the instructions online for #’s 1 & 2, I’ll insert a link here, or follow my blog for notices of my new posts.


Constructing stomp sticks (left) and panflutes (above).


Participants created an ‘informance’ in which they played their instruments and danced in the conference's culminating event in the auditorium. I thoroughly enjoyed the creativity, collaboration and synergy of this event!


Saturday, March 29, 2014

Spring and Easter Music Ideas and Freebies

I've added a fun yet meaningful activity for young students as a FREEBIE in my TPT Store. It can be used in centers or team activities to reinforce and assess so-mi-la, ta, ti-ti, rest and engage students in composing, clapping and singing. Here's a linked preview:


I've created some beautiful new materials for spring. These are favorites of my students, and I think you and your students will also find them useful and joyful. 


In my "Spring" Listening, Moving and Mapping set, I have included a two-page teaching guide, form-mapping cards for both younger and older students (Level I: ta, ti-ti, rest, ta-ah; and Level 2: ti-ti, ti-tiki, syncopa), printable and projectable sonnet text pages and score page, and links to music and additional resources.


My Spring Fling set is loaded with 70 text-to-rhythm cards, 48 possible ostinato strips / measure mats, and four detailed, engaging lesson plans with suggestions for extensions and variations.


These are some of my spring products posted last year which have received excellent feedback:


And last but not least, here's an oldie but goodie FREEBIE:  : )  


Happy Easter and happy spring! Thanks for stopping by!

Monday, March 24, 2014

More Home-made Stringed Instruments - How to Make a String-ophone

I'm a music 'junkie' in more ways than one! (1) I am  definitely hooked on music. I can't imagine life without it. (2) I hear music in everything - movement, language, environments, machinery, and junk. And if you follow my blog, you know I get a kick out of making instruments from throw-away and found items.

In my last post about how to make a bottle guitar, I promised more to come, so here are a few of my chordophone gems. These aren't just noise-makers; they are instruments capable of a fairly decent tone and a pitch range between four and eight notes. I have made these with groups of 20-30 students at a time (having done the cutting and drilling ahead of time). Here's a demo video of the twist-top instrument (pictures and instructions below).

Materials
A plastic bottle with a twist-top lid (rigid enough to support string tension)
String - heavy fishing line, thin wire, or a piece of a broken guitar string
Two plastic pony beads or buttons

Tools
An electric drill  (Please have an adult do the drilling and cutting.)
An X-acto knife, pocket knife or small paring knife
Felt-tip marker
Scissors

How To
(1)  Drill a small hole in the bottom center of your bottle.

(2)  Mark the area you want to cut out for a sound hole (approximately 3 cm wide by 8 cm long, or 1.2 in by 3 in). Puncture the bottle with your knife in the center of the area you have marked, and then carefully cut to and around the inside edge of your line. Note: Avoid cutting the opening too big because it will weaken the bottle. On some bottles, you can use scissors to cut the plastic once the hole is started.

(3)  Tie one end of your string to a bead (or button) using a square knot. 


(4)  Twist the lid to the open position, remove it from the bottle and keep it close by.

(5) Push the free end of the string into the hole you drilled in the bottom of the bottle. Guide the string through the bottle and out the top.  Then push the string through the twist-top lid and screw the lid back onto the bottle.

(6)  Pull the string as tight as possible with one hand while turning the twist-top to the closed position with your other. 


(7)  Draw the top piece of string through a bead (or button) a couple of times, pulling tightly. Then tie a square knot under the bead and trim excess string.

(8)  Decorate with stickers or marker if desired. Enjoy! As in the video above, pluck the string through the sound hole and twist the lid to change pitch.

Here are some variations using various bottles (including a 2 liter pop bottle, a pancake syrup bottle, and a one liter pop bottle). In place of a twist top, tie the string to a clothespin or short wooden dowel and tip the stick to create tension on the string.


Here's a link to a great website by a fellow music 'junkie,' Nick Penny. Check out his video instructions for making a 'Poptar' with a 2 liter bottle:  http://www.youtube.com/watch?v=he215SLuOLI

Wednesday, February 26, 2014

St. Patrick's Day Note-Spelling & Freebie

Just a quick update... I've uploaded several St. Patrick's Day-themed note-spelling sets in my store
(1)  33 treble spaces-only words/slides,
(2)  28 treble lines-only slides,
(3)  a combination set with a whopping 83 words, and
(4)  a set of printable or projectable note-spelling staff pages, icons and instructions for several activities with a magnetic whiteboard or as a floor game. (Pictures are hyperlinked to the products.)

Also, in appreciation to my followers, I'm including a printable or projectable staff page below (from the Treble Treasures set). Just click on the bottom image in this post to enlarge or print it. You can project this and use it on a whiteboard or print it and have students 'spell' various words using candies, magic coins (pennies) or math counters as notes and have fun! : )


Freebie Printable or Projectable - Click on this PNG file to enlarge or print.
Happy St. Patrick's Day. Thanks for stopping by!

How to Make a Bottle Guitar

If you follow my blog, you know by now that I enjoy making instruments out of found items just for the fun (and challenge) of it.  I also love to help students create instruments that actually make music.

Making a good chordophone (stringed instrument), not just a look-alike, can be a challenging project. Through trial and error, I've found a couple of easy ways to create playable, decent sounding string instruments that can produce a variety of pitches.

In making any instrument, there are three main components to consider: (1) a source of vibration, (2) a resonator or hollow cavity to amplify the sound, and (3) a device or technique for regulating/varying pitch. When creating a stringed instrument, suspending the string while supporting its tension presents a unique challenge. Having a strong fingerboard and solid hollow body are keys to success. In this post, I want to share my bottle guitar ideas with some basic guidelines for creating these. 

Materials:

     Fingerboard - part of a yardstick or a paint stick will do 
          (Mine had paint samples already on it for 'frets.')
     Plastic bottle
           (Shampoo and dish soap bottles are pictured.)
     Small pieces of wood or plastic for nut and bridge 
          (I used a small Lego for one of my bridges.)
     String - fishing line, wire, or rubber bands 
          (Pieces of old guitar or violin strings work great.) 
     Stickers or markers to decorate (optional)

Tools:

     Electric drill
     Exact-o knife or small pocket knife
     Small hack saw if your plastic is extra hard
     Needle-nose pliers if using metal string
     Glue (to hold nut or bridge in place)
     Please have an adult do any cutting and drilling.

Instructions:

(1) Decide how you will attach the string to the fingerboard. You can attach it at each end which will require holes at each end (as in the green guitar) or wrap it completely around the fingerboard and connect the ends on the back side of the stick. Drill holes if needed.

(2) Design a nut (a small piece of wood or plastic that will hold the string above the fingerboard) and attach it to the top end of the fingerboard. 

(3) Design a bridge (piece of wood or plastic about 1 cm or 1/3 inch high) to insert under the string and suspend it above the fingerboard. 

(4) Setting the bridge aside for later, tighten your string onto the fingerboard (as tight as possible).

(5) Create the body of your instrument by cutting a sound hole (and plucking space) in the front/face of your bottle. 

(6) Cut or drill notches in the bottom and neck of the bottle to snugly fit and support your fingerboard. (Please study pictures below.)

(7) Insert your fingerboard into the bottle neck and slightly through the slot in the bottom of your bottle.

(8) Insert the bridge under your string(s).

(9) Decorate and mark finger placement if desired.

(10) Pluck the string through the sound hole with your dominant hand, and press the string against the fingerboard with your other hand to change the pitch. Have fun!


More chordophones to come in my next post. Thanks for stopping by!